No Bake Mocha Fudge Pie Recipe
Julianne Bayer Dell | Beyond FrostingNo bake mocha fudge pie is cool, creamy, and the perfect way to finish out summer. You don’t even have to turn on the oven!
When the inspiration for a dessert hits, I generally jump off the couch to get to work. Despite my laundry list of ideas, sometimes it’s difficult to motivate myself to get started, until I see something I just can’t wait to make.
I saw a photo of an Almond Mocha Mousse Cake over the weekend and I knew this would make the most glorious no-bake dessert. So at 8pm, I got off the couch and went straight to the kitchen.
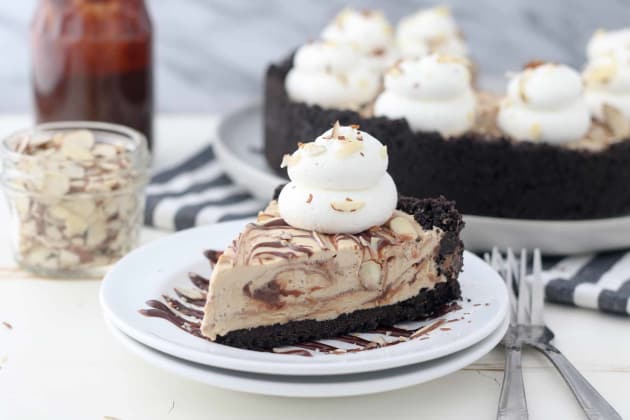
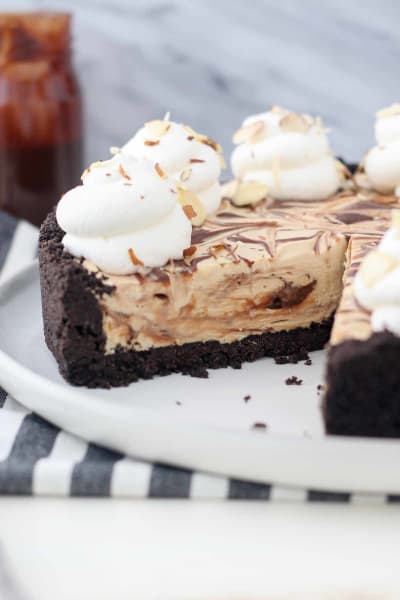
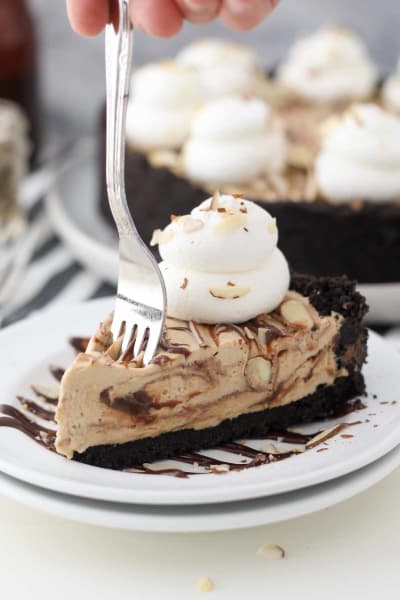
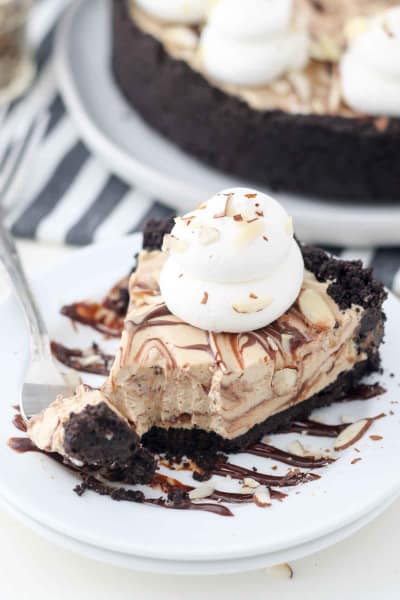
The combination of the Oreo cookie crust, the light and fluffy mocha mousse filling and ribbons of sweet hot fudge make this No-Bake Mocha Fudge Pie worthy of a second helping.
These types of no-bake pies are quite popular at my house. My favorite versions have a mousse filling made with some combination of cream cheese, chocolate and whipped cream. I have flavors such as dulce de leche, key lime, strawberry and more.
The chocolate transforms the filling, masking any of the tangy flavor you might get from the cream cheese and instead turning it into a subtle sweetness that takes on any flavor you might mix into it.
In this case, it’s coffee.
To make the coffee mousse, I used a strong brewed espresso in combination with espresso powder. The espresso powder takes the mocha flavor over the top. You can only had so much of the brewed espresso to the filling, so the extra espresso powder is necessary here.
It might seem like there’s a lot of steps involved but it’s all relatively easy to do.
When melting the chocolate, I suggest to melt at 50% power so you do not burn the chocolate. I also prefer to use chocolate bars instead of chocolate chips.
Chocolate chips tend to have a coating on the outside and are usually more oily when melted.
You’ll need to make a batch of homemade whipped cream as well. You could use Cool Whip, but the homemade whipped cream is so much tastier.
Once the filling is ready to go, it is layered together with hot fudge.
For the hot fudge sauce, I just use a store-bought sauce like Hersheys or Smuckers. You should heat the hot fudge sauce until its thin enough that it drizzles off the spoon, but not too hot to the touch.
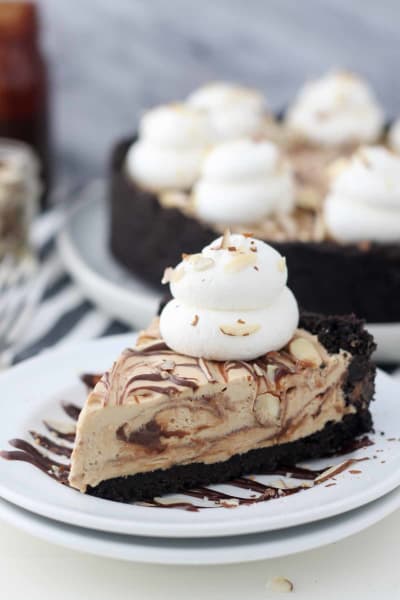
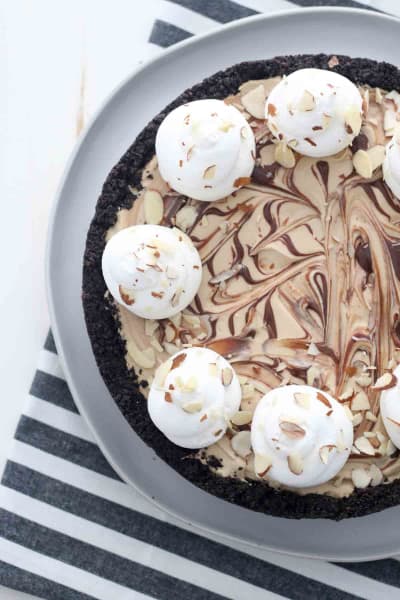
Layer in about 1/3 of the filling then swirl in a couple of tablespoons of the hot fudge. Just drizzle it over the filling and then swirl it with a knife.
After a couple of hours in the fridge, this pie is ready to slice, and you didn’t even have to turn on the oven!
Are you tired of the dinner routine?
Stuck in a rut or looking for fun new recipes to try?
Our Facebook Group is growing every day! If you haven’t joined yet, we invite you to come check it out and join the fun.

You can ask for recipe ideas, talk about cooking techniques, or get help figuring out the right new pan set for you. If you’ve already joined, invite a friend along!
No Bake Mocha Fudge Pie Recipe
Ingredients
For the Crust:- 1 14 oz package Chocolate Sandwich Cookies
- 8 tablespoons Unsalted Butter
- 1 tablespoon Water, cold
- 1 teaspoon Unflavored Gelatin
- 4 ounces White Chocolate, chopped
- 1 cup Heavy Whipping Cream, plus 2 tablespoons, divided
- 1/4 cup Powdered Sugar, plus 2 tablespoons
- 1 tablespoon Espresso Powder, plus 2 teaspoons, divided
- 8 ounces Cream Cheese, softened
- 1/4 cup Granulated Sugar
- 1 teaspoon Pure Vanilla Extract
- 1/3 cup Hot Fudge Sauce
- 1 cup Heavy Whipping Cream
- 1/4 cup Powdered Sugar
- Sliced Almonds, for garnish
Directions
For the Crust:
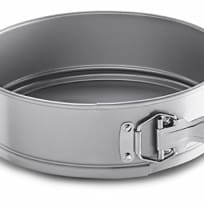
- Prepare a 9-inch springform pan by lightly greasing the edges of the pan with cooking spray, and then wiping gently with a paper towel.
- Grind one package of cookies into a fine crumb using a food processor or blender.
- In a small bowl, melt the butter in the microwave for 30 to 45 seconds.
- Pour the melted butter over the cookie crumbs and stir until the crumbs are well coated.
- Pour the crumbs into your springform pan and press firmly into the bottom and up on the sides to create a thick crust. Refrigerate or freeze the crust while you are preparing the filling.
For the Filling:
- Place the mixing bowl and whisk attachment in the freezer for 5 to 10 minutes to chill while you are preparing the next steps.
- Place 1 tablespoon of cold water in a small dish. Sprinkle the powdered gelatin over the water, spreading evenly. Allow the gelatin to turn to a solid (about 2-3 minutes)
- In a microwave-safe bowl, microwave the white chocolate and 2 tablespoons heavy whipping cream at 50% power in 30-second increments, stirring each time until the chocolate is melted.
- Next, melt the gelatin in the microwave for 8-10 seconds until it turns back to a liquid. Watch it closely!
- Then brew the espresso; combine 1 tablespoon of espresso powder with hot water and stir until the espresso is dissolved. Cool until you can touch, refrigerating if necessary.
- Pour 1 cup of heavy whipping cream into the chilled bowl and use an electric mixer to beat the heavy cream on medium-high speed until the cream starts to thicken.
- Slowly add the powdered sugar and liquid gelatin and continue beating on high speed until stiff peaks form. Set the whipped cream aside.
- Soften the unwrapped cream cheese in the microwave for 15 seconds. Change the mixer to the paddle attachment and beat the cream cheese until it’s completely smooth.
- Scrape down the sides of the bowl, and add the granulated sugar, 3 tablespoons of the brewed espresso, 2 teaspoons espresso powder and vanilla extract to the cream cheese. Beat until well combined.
- Then add the melted chocolate, beating until it’s completely mixed into the cream cheese.
- Lastly, fold in the prepared whipped cream and mix until all ingredients are combined.
- Heat the hot fudge sauce in the microwave for 30-60 seconds until it’s thin enough to drizzle.
- Layer the filling into the prepared crust, 1/3 at a time, followed by add a couple of tablespoons of hot fudge sauce for each layer. Swirl with a knife.
- Refrigerate for 3-4 hours until the filling is completely set.
For the Topping:
- Pour 1 cup of heavy whipping cream into the chilled bowl and use an electric mixer to beat the heavy cream on medium-high speed until the cream starts to thicken.
- Slowly add the powdered sugar and continue beating on high speed until stiff peaks form. Pipe the boarders of the mousse cake using a large open round tip.
- Garnish with sliced almonds. This dessert must stay refrigerated.
Recommended
- Published:
- Author:
- Julianne Bayer Dell
- Cooking Method:
- No Bake
- Category:
- Desserts
- Tags:
- No Bake Desserts, No Bake, Easy Desserts, Desserts, Pies, Easy, Chocolate, Coffee, Oreos, White Chocolate
- Related Recipes:
- No Bake Dessert Recipes, No Bake Recipes, Easy Dessert Recipes, Dessert Recipes, Pie Recipes, Easy Recipes, Chocolate Recipes, Coffee Recipes, Oreo Recipes, White Chocolate Recipes
- Recipe Yields:
- 10 servings
- Prep Time:
- Chilling Time:
- Total Time:
- Related Post:
-
Published:
Author: Julianne Bayer Dell
Recipe Yields: 10 servings
Prep Time: 30 minutes
Total Time: 210 minutes
Nutrition Facts
Amount Per Serving


