Fried Cheese Balls Recipe
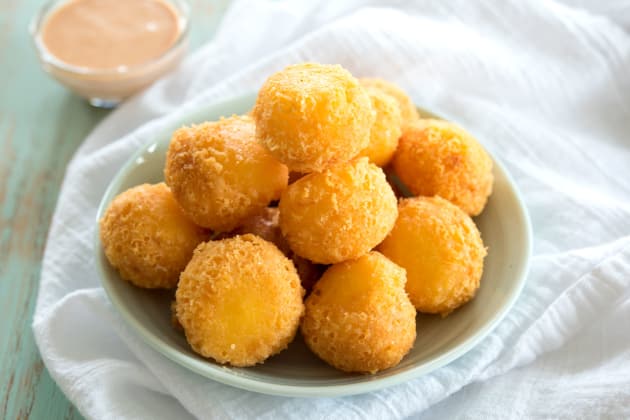
Rebekah Garcia Kalinowski | Kitchen GidgetWhat’s better than cheese? Fried cheese balls! Only three ingredients in this easy, cheesy appetizer that’s crunchy on the outside while melted and gooey on the inside.
These fried cheese balls are a popular snack in Latin America where they’re known as bolitas de queso – literally, little balls of cheese.
They can be eaten plain or with a sauce for dipping. I prefer MayoKetchup myself which has a hint of garlic.
My husband loves them dipped in ranch dressing. He loves everything with ranch!
Now, the typical cheese used for these is gouda. The real gouda which comes in a ball dipped in red wax.
However, it’s not the only cheese that can be used. My old Spanish cookbook listed Edam, Swiss or cheddar, and I’ve seen other cooks use Monterrey Jack.
Any semi-firm cheese that you like should work.
Just keep in mind that it will have a strong, salty cheese flavor, so choose a mild cheese.
I don’t recommend using any pre-shredded cheese. That stuff is coated with anti-caking powders and you want a fresh cheese that’s going to melt beautifully.
Shred by hand with a box grater or run it through the shredding plate on your food processor in less than a minute like I do. Love my food processor!
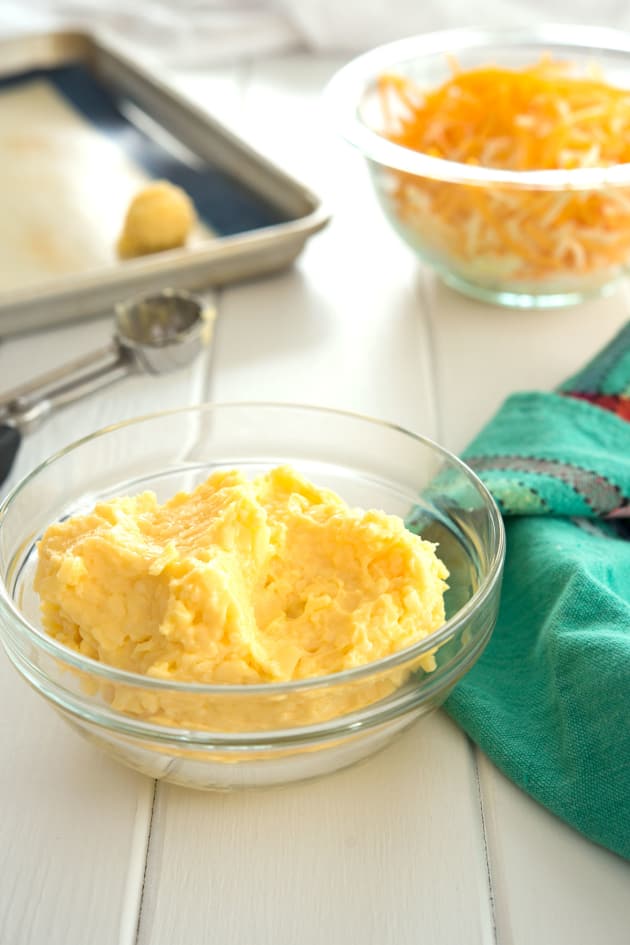
After shredding, mix with 1 whole egg or 2 egg whites. I like the flavor of just the egg whites a little bit better (the yolk makes it very rich), but I also hate to waste food. Either option works!
You’ll also mix in some cornstarch or all-purpose flour. The cornstarch makes them extra crispy (and gluten free), but wheat flour has a little better flavor. Again, the choice is up to you.
You can mix the ingredients with an electric mixer or by hand, but it will take a little bit of elbow grease to get it come together and form a dough.
You may need to add additional flour if the mixture is too wet, but not too much since it will stiffen up when refrigerated.
Scoop little spoonfuls of the dough and roll into balls. I like to use a little cookie scoop so they’re all even.
Some people like to roll the bolitas in cornstarch, flour or cracker crumbs to form a coating. This step is completely optional.
I’ve tested all of these options so you don’t have to. Here are the results:
The cornstarch was messy when frying and I don’t recommend. The flour was fine, but unnecessary.
The cracker crumbs gave it an extra crunchy coating, but browns faster when cooking so keep a close eye.
Conclusion: I prefer to leave them naked, which is quick and easy, or rolled in cracker crumbs.
At this point, the bolitas de queso can be fried. But for much better results refrigerate the balls until chilled. This will help the cheese keep its shape better when frying.
You can also freeze them to cook at a later time. Freeze until hard, then put them in a zip-lock bag.
When you want fried cheese balls, just pull out the amount you need and fry them without waiting to thaw. Fry the cheese balls until crispy and golden.
Serve immediately as an appetizer, snack or with your favorite Latin meal like Puerto Rican rice and beans with pork chops. Just think of these as a mac and cheese alternative!
Are you tired of the dinner routine?
Stuck in a rut or looking for fun new recipes to try?
Our Facebook Group is growing every day! If you haven’t joined yet, we invite you to come check it out and join the fun.

You can ask for recipe ideas, talk about cooking techniques, or get help figuring out the right new pan set for you. If you’ve already joined, invite a friend along!
Fried Cheese Balls Recipe
Ingredients
- 2 cups Shredded Gouda Cheese, (8 ounces)
- 1 Egg, or 2 egg whites
- 2 tablespoons Cornstarch, or all-purpose flour
- 1/2 cup Cracker Crumbs, for dredging (optional)
- Vegetable Oil, for frying
- Your Favorite Sauce, for dipping
Directions
- With an electric mixer or by hand, mix the cheese, egg and cornstarch (or flour) in a large bowl until a soft dough forms.
- Scoop 2 teaspoons of dough and roll into a ball. If desired, roll balls in cracker crumbs for an extra crispy coating. Refrigerate cheese balls until thoroughly chilled, about 30 minutes.
- In a medium frying pan, heat oil over high heat (350°F for deep frying). Fry cheese balls until golden brown, turning once, about 30-60 seconds per side.
- Drain on paper towels. Serve hot with your favorite sauce for dipping.
Recommended
- Published:
- Author:
- Rebekah Garcia Kalinowski
- Cooking Method:
- Fried
- Category:
- Snacks
- Tags:
- Cheese, Appetizers, Snacks, Family Meals and Snacks, Party Food, Fried, Easy
- Related Recipes:
- Cheese Recipes, Appetizer Recipes, Snack Recipes, Family Meals and Snack Recipes, Party Food Recipes, Fried Recipes, Easy Recipes
- Recipe Yields:
- 20 balls
- Prep Time:
- Cook Time:
- Total Time:
- Related Post:
-
Published:
Author: Rebekah Garcia Kalinowski
Recipe Yields: 20 balls
Prep Time: 10 minutes
Cook Time: 5 minutes
Total Time: 15 minutes
Nutrition Facts
Amount Per Serving


