Red Velvet Thumbnail Cookies Recipe
Amanda Powell | A Cookie Named DesireSoft red velvet thumbprint cookies filled with a velvety cream cheese icing. These cookies are a perfect little twist on a favorite classic cookie.
Thumbprint cookies are my favorite cookie. I love how small and soft they are and the filling is always just the perfect little treat in the middle.
Red velvet thumbprint cookies are a version I like for all the winter holidays. I love the soft red velvet paired with velvety cream cheese icing whenever I want something sweet and a little indulgent (although, it is also amazing with nutella, see my red velvet nutella cookies for proof).
What Are Thumbprint Cookies
Thumbprint cookies use a sugar cookie dough that is rolled into balls, then indented in the middle. Usually, a thumb is used to create the indent, which is where the name “thumbprint cookie” originates.
If you don’t want to use your thumb, you can easily use the bottom of a wooden spoon.
Typically, a traditional thumbprint cookie is rolled in sugar and filled with jam. This time, we are doing a delicious, fun twist using red velvet and cream cheese frosting.
How to Make Thumbprint Cookies
Making these thumbprint cookies is so easy. We start off with a basic thumbprint cookie dough with added cocoa powder and red coloring.
You can use red food coloring or a red velvet emulsion. I prefer using a red velvet emulsion as it adds to the flavor and gives it a deeper color.
- Make the cookie base by beating the butter and sugar together, then adding extract, food coloring, and egg.
- Mix in the dry ingredients until just combined.
- Roll the dough into balls.
- Create an indent in the middle of the cookie dough.
- Bake for about 10 minutes, then cool.
- Beat the ingredients for the filling, then pipe the filling into the indentation.
- Enjoy!
Are Thumbprint Cookies Soft
These cookies are sturdy but wonderfully soft. There is a slight chewiness to them that pairs wonderfully with the velvety cream cheese filling.

How Can You Keep Thumbprint Cookies From Spreading
This recipe does not spread luckily. It also does not require any chilling.
If you do experience spreading, you might want to check that you measured your ingredients correctly and did not add too much butter or too little flour.

Ensure your butter is fully softened (but not so soft they are nearly melted) and beaten well. Any lumps of cold butter can leak out and create a mess of your cookies.
Don’t grease your baking sheets. Instead, use a silicone baking mat. The baking mats have a texture that helps grab the cookie dough and keep it from spreading out.

Can You Freeze Thumbprint Cookies?
Yes, you can freeze these red velvet thumbprint cookies. Put them in an airtight container and they should last at least a month in the freezer. To thaw, leave them in the refrigerator overnight.
Are you tired of the dinner routine?
Stuck in a rut or looking for fun new recipes to try?
Our Facebook Group is growing every day! If you haven’t joined yet, we invite you to come check it out and join the fun.

You can ask for recipe ideas, talk about cooking techniques, or get help figuring out the right new pan set for you. If you’ve already joined, invite a friend along!
Red Velvet Thumbnail Cookies Recipe
Ingredients
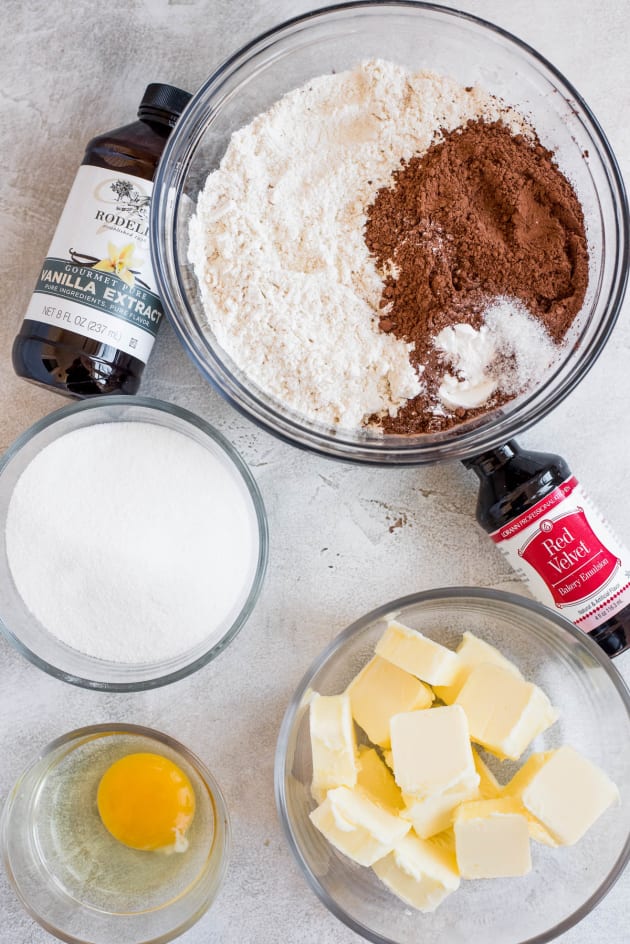
For the Cookies:- 1 cup Unsalted Butter, room temperature
- 1 cup Granulated Sugar
- 1 large Egg, room temperature
- 1 teaspoon Pure Vanilla Extract
- 3 teaspoons Red Velvet Emulsion, (or red food coloring)
- 2 1/2 cups All-Purpose Flour
- 1/4 cup Cocoa Powder
- 1 teaspoon Baking Powder
- 1/2 teaspoon Salt
- 4 ounces Cream Cheese, room temperature
- 2 tablespoons Unsalted Butter, room temperature
- 1 teaspoon Pure Vanilla Extract
- 1/4 teaspoon Salt
- 1 1/2-2 cups Powdered Sugar
- 1-2 tablespoons Heavy Cream
- Sprinkles, optional
Directions
- Preheat the oven to 350°F. Line two baking sheets with parchment paper.
- Beat the butter and sugar together until fluffy and light.
- Add in the egg, vanilla, and red velvet emulsion. Beat well.
- Mix the flour, cocoa powder, baking powder, and salt together, then beat into the butter mixture until it is just incorporated.
- Roll the dough into 1-inch balls. Place about 1 ½ inches apart on the baking sheet.
- Use the end of a wooden spoon to create an indent in the dough.
- Bake for 10 - 11 minutes.
- Allow the cookies to rest on the baking sheets for a minute, then transfer to a wire rack to cool completely. If the indents seem puffy, gently press down.
- As the cookies cool, make the filling.
- Beat the cream cheese and butter together until smooth. Mix in the vanilla and salt.
- Beat in the powdered sugar and then drizzle in the heavy cream.
- Put the cream cheese filling in a piping bag and pipe in the filling into the indents.
- Top with sprinkles, if desired.
Recommended
- Published:
- Modified:
- Author:
- Amanda Powell
- Cooking Method:
- Baking
- Category:
- Snacks
- Tags:
- Cookies, Valentine's Day, Red Velvet, Baking, Baked, Snacks, Family Meals and Snacks, Lunchbox, Party Food
- Related Recipes:
- Cookie Recipes, Valentine's Day Recipes, Red Velvet Recipes, Baking Recipes, Baked Recipes, Snack Recipes, Family Meals and Snack Recipes, Lunchbox Recipes, Party Food Recipes
- Recipe Yields:
- 35 cookies
- Prep Time:
- Cook Time:
- Total Time:
- Related Post:
-
Published:
Author: Amanda Powell
Recipe Yields: 35 cookies
Prep Time: 25 minutes
Cook Time: 10 minutes
Total Time: 35 minutes
Nutrition Facts
Amount Per Serving


