
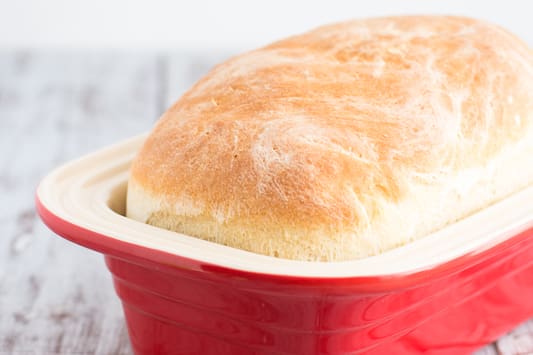
Simple White Bread Recipe
Jennie Phaneuf | One Sweet MessSimple white bread that you'll be making every week. Perfect for sandwiches piled high with the best cold cuts.
Sweet, yeasty notes float to your nostrils with every gentle push on the soft, malleable dough. A light dusting of flour coats your counter, floor, and clothes. Your hands are cloaked with a thin, powdery layer and rogue bits of dough make themselves comfy in your long locks. There’s a smear of flour on your forehead from tending to a mid-knead itch.
Before you know it, you’re lost in the methodical art of bread making.
I realize that the very thought of yeast, dough, or kneading can elicit panic and cause mild fits of anxiety. When I so much as mention the words homemade bread, a look of intense fear washes over the other person. Their eyes go wide and they get this distant look on their face, as if they’re conjuring up the memory of their last bread-making experience.
I’m here to help!
I promise to make the art of homemade bread as simple as I possibly can. Today, we’re going to start off with my grandmother’s recipe for simple white bread. There will be no need for fancy ingredients; flour, water, milk, yeast, butter, and salt are all you’ll need. Not at all scary, right?
You will not have to learn any difficult, yoga-like hand contortions—no pinching, twisting, or braiding. The simple method of kneading and plopping will suffice.
Since not everyone owns a fancy mixer with a dough hook attachment, we’re going to do things the old-fashioned way and use our mitts.
Rule #1 (aka the most important rule): Don’t, under any circumstances, boil your milk. Boiled milk=dead yeast. Dead yeast=flat, dense bread. You want your milk to be hot to the touch. Here’s how it’s done: Stick your finger in the pot of milk; if you can keep it in, it’s not hot enough. If your natural reaction is to get your finger the heck out of there, it’s ready.
If you want to get technical, you can bust out your thermometer. Your milk shouldn’t go above 110°F. I’m lazy and like to avoid extra dishes at all costs.
Rule #2: Invest in good-quality yeast. I prefer Red Star. Their platinum yeast will shorten your rise time by half. If you can’t find their Platinum line of yeast, rapid-rise will work just fine. No more waiting all day for a loaf of bread.
Rule #3: Prepare. Measure out all of your ingredients before you begin making the bread. Your flour, yeast, and salt can go in one bowl. Mix your milk, water, butter, and sugar in a saucepan. This will prevent any surprises from creeping up.
Rule #4: Don’t skimp on the knead. Kneading builds strength and elasticity. The gentle manipulation of the dough forms protein chains that capture the carbon dioxide in the yeast and contains it within the dough. If you skip the kneading process, your dough won’t rise as high, creating a denser loaf of bread.
Rule #5: Place the well-kneaded dough in an oiled bowl in an undisturbed location. One bump can cause your dough to deflate, so choose your spot wisely. Cover your dough with a clean, dry towel (nothing too heavy). Don’t skip the second rise; it’s essential to the success of your bread.
Rule #6: Always preheat your oven. The heat is your friend here. It’s what promotes a high rise and that crispy crust everyone loves so much.
Rule #7: Allow your bread to cool in the pan for 30 minutes before transferring to a wire rack to cool completely. Make sure your bread is completely cool before you store it in an airtight container or plastic bag. If you place your warm loaf in a plastic bag, it will create steam and cause your bread to become soggy. Not good.
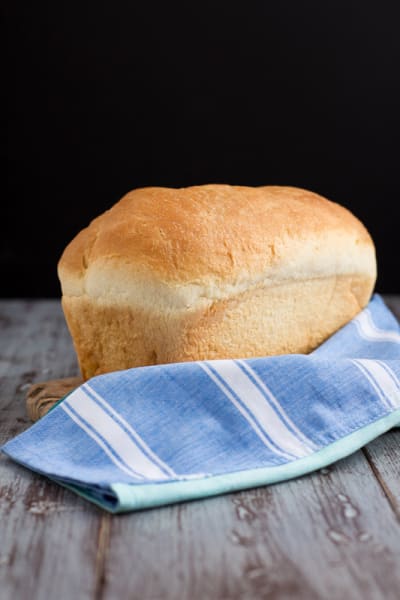
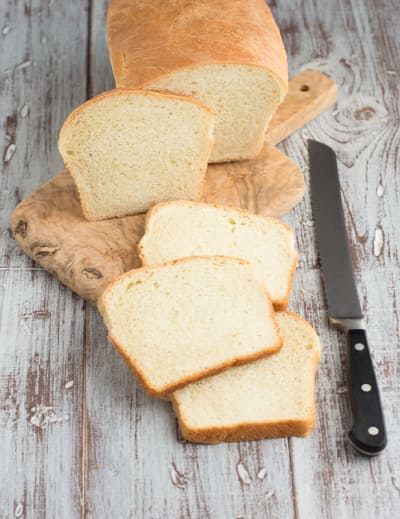
If you follow all of these steps, you’ll have a gorgeous loaf of white bread. This particular recipe creates a soft center with a crunchy, golden brown crust. Slice it thick, or slice it thin. Toast it and slather it with heaping gobs of butter and strawberry balsamic jam, rhubarb jam, or apricot jam. Dip it in egg and sear it on a griddle to make the best French toast.
Or, my favorite, slice it while it’s warm straight out of the pan.
I make this recipe at least once a week. With a little practice, you’ll be churning out dough at warp speed—I promise. Homemade bread cuts down on cost and tastes better than any bag of bread that you’ll find at the grocery store. You can use this same recipe to create dinner rolls.
Are you tired of the dinner routine?
Stuck in a rut or looking for fun new recipes to try?
Our Facebook Group is growing every day! If you haven’t joined yet, we invite you to come check it out and join the fun.

You can ask for recipe ideas, talk about cooking techniques, or get help figuring out the right new pan set for you. If you’ve already joined, invite a friend along!
Simple White Bread Recipe


Rate This Recipe
Ingredients
- 1 1/4 ounce packet Active Dry Yeast
- 3/4 cup Milk
- 3/4 cup Boiling Water, hot
- 1 1/2 tablespoons Granulated Sugar
- 3/4 teaspoon Kosher Salt
- 1 1/2 tablespoons Butter
- 3 1/2 cups All-Purpose Flour, or bread flour, plus more for kneading
Directions
- Place flour, yeast, and salt in a large bowl. Whisk to combine. Set aside.
- Heat milk and water in a small saucepan until hot to touch (do not boil). Take off heat and add butter and sugar. Stir until the butter melts in to the milk mixture (a few lumps are okay).
- Make a well in the flour mixture and pour in milk mixture; mix with a rubber spatula to combine. Turn dough out onto a floured surface. Knead for 6-8 minutes, gradually adding flour until the dough is no longer sticky.
- Place dough in a large, greased bowl, turning once to grease both sides. Place the bowl in a warm, undisturbed spot and cover with a clean dishtowel. Allow the dough to rise until it doubles in size, 60-90 minutes.
- Turn dough out onto a lightly floured surface. Knead the dough briefly. Lightly grease a loaf pan. Form the dough in the shape of a rectangular log the length of your bread pan, then plop the dough into the pan. Place the pan in a warm, undisturbed spot and cover with a clean dishtowel. Let rise for 1 hour before baking.
- Preheat oven to 350°F.
- Bake for 30-35 minutes, or until the top is a dark golden brown. Allow the bread to cool for 30 minutes in the pan before transferring to a wire rack to cool completely. Serve warm with a generous helping of butter.
- Store the completely cooled loaf of bread in an airtight bag for up to 5 days.
Recommended

- Published:
- Modified:
- Author:
- Jennie Phaneuf
- Cooking Method:
- Baking
- Category:
- Bread
- Tags:
- Bread, Baking, Sandwiches, Lunches, Easy
- Related Recipes:
- Bread Recipes, Baking Recipes, Sandwich Recipes, Lunch Recipes, Easy Recipes
- Recipe Yields:
- 1 loaf
- Prep Time:
- Cook Time:
- Rising Time:
- Total Time:
- Related Post:
-
Published:
Author: Jennie Phaneuf
Recipe Yields: 1 loaf
Prep Time: 25 minutes
Cook Time: 35 minutes
Total Time: 150 minutes
Nutrition Facts
Amount Per Serving


